Guest post by Kate Watson
In the last year and a half I have accumulated more scars than I did in the previous 32. I’ve been learning to mountain bike. I’ve had crashes that I saw coming when I first spotted the switchback, and crashes where I was suddenly flat on my face wondering why that sagebrush had a vendetta against me. Luckily, none of my crashes have resulted in more than scrapes and bruises, and I’ve learned some things along the way. Essentially, I’ve gotten better at not crashing. Of course I don’t have all the answers, but if you’re a beginning biker, maybe some of these strategies will help.

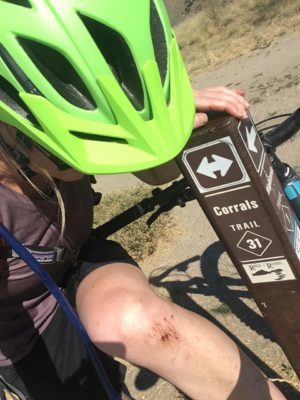
A typical end-of-ride shot after making friends with the rocks on Bob’s at ground level.
-
Look.
Look where you want to go, not at that huge rock right at the apex of the turn. The rock is not moving, but if you’re focused on it you’ll probably get to say hi at ground level. Instead, turn your head and look down the trail–your body and bike will follow your sightline. I promise the rock won’t jump in front of your bike. (Note: This is hard, and my nemesis is right-turning switchbacks. Oh, hey, Mahalo–looking at you! Seriously though, brake early, keep a bit of forward momentum and turn your head as you make the corner. Somehow, magically, everything else follows.)
-
Leave it.
Even if you promised yourself you would try it this time, it’s okay to skip a feature if you’re just not feeling it. It’s okay to walk the rocky sections on Eastside (just make sure there’s no one coming behind you first), and it’s okay to ride right up to a drop and stop at the last second (again, preferably with no one behind you). That feature will be there next time, and it might just motivate you to come back–but if you’re not ready, leave it for now.
-
Do it!
If you crash and it’s not too traumatic, don’t be afraid to try that switchback/rock garden/tech section again. (First you might want to sit down, eat your Clif Bar and wait for the adrenaline to burn off.) It might take a time or two get the section right, but you’ll build confidence and develop technique by using what you learned from the crash. And not living in fear of your next ride on Bob’s is going to make you a much happier biker.
-
Stop worrying.
I see you, white knuckles. Locking your handlebars in a death grip will make your movements jerky and stiff. The more tense you are, the worse you’ll ride. Just loosen up a bit, let your bike take on the terrain and focus on braking smoothly and only when necessary. Practice on trails like Polecat or Shane’s that lend themselves to a smooth, flowing ride.
-
Know the terrain.
Pay attention to the varying soils on the Boise Trails. There’s sandy Hull’s Gulch, loamy Around the Mountain and pine cone scattered Mahalo. If you learn the characteristics and quirks of all different types of terrain (no locking up your brakes in sand!) you’ll be that much more prepared the next time you try a new trail in Boise or beyond.
-
Don’t go clipless.
This might be a controversial suggestion, but I’d stick with platform pedals, at least to start. Uphills will take a little more effort (that last push on Corrals, ugh), but it’s nice to NOT be attached to your bike if you go over the handlebars, or become the victim of a gravity gust.
-
Practice in your backyard.
Sometimes you don’t have time to head into the foothills. Instead, you can practice technical skills on a quick spin around your neighborhood. Ride along the edge of the sidewalk to simulate skinny trails or bridges. Practice staying behind the saddle down a short flight of stairs. Ride up curbs to get a better feel for your bike. And obviously, always use common sense, respect pedestrians and don’t break the law. You might find the features on Table Rock a lot less daunting when likened to the stairs at your neighborhood park.
-
Keep moving.
You don’t have to go as fast as your more experienced friends/partner/the pros, but remember that having some speed makes it easier to roll through sand, rocks and pinecones. If you ride too slowly through the rock garden on Sweet Connie, every one of those rocks becomes a roadblock rather than a speed bump. Plus, no momentum = tipping over–unless you’ve perfected your trackstand. Ride at a comfortable pace, but keep in mind that mountain bikes are made for rougher terrain and they need forward movement to do their job.

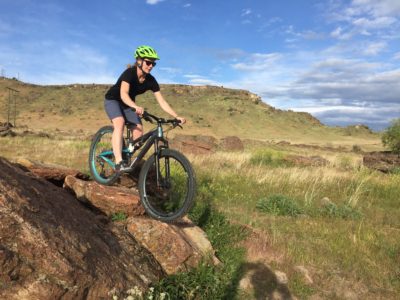
“It’s no steeper than the stairs at the park, it’s no steeper than the stairs at the park, it’s no steeper than the stairs at the park.” Table Rock is a good place to test your technical skills, with easy ride arounds on features you’re not ready to try yet.
-
Brake lightly.
If your bike has disc brakes try using one finger to brake, not all four. I carried over bad braking habits from my v-brake road biking days, and started grabbing the brakes at sketchy sections of trail before my brain had a chance to process what was happening. This panic-braking resulted in several crashes (remember, no momentum = tipping over). Braking with only your index finger makes it a lot harder to mash the brakes every time your lizard brain spots an obstacle and freaks out.
-
Just ride.
Keep riding, despite crashes. The Eagle Bike Park, which was initially extra intimidating to me, turned out to be a great place to try different types of trails and build skills without the commitment of a longer trail. Don’t expect yourself to become an expert quickly (or maybe ever). Part of the fun is in learning and seeing yourself progress. Last year, The New York Times ran an excellent piece called “(It’s Great to) Suck at Something.” And it’s true. But it’s also nice to keep the crashes to a minimum when you can. See you out there!


Be the first to comment…
Have you done some trail work lately? Got a trail condition to report? Please share it here...
Got something to add to this post? Please share it here...